
In the Beginning
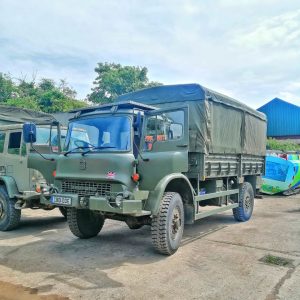
In 2023 we were asked to build a habitation box on a Bedford lorry. We began our work with Jess and Dan before they bought their truck. As complete newbies to the overland and truck scene they asked us to join them to look at prospective trucks and we were happy to help. We visited Crouch Military Supplies and viewed half a dozen different lorries, mostly Leyland DAF’s and Bedfords.
They chose a 1985 Bedford MJ, ex-military lorry and before long we were building their habitation box.
We spent some time working on the design which had some very interesting components. Jess and Dan wanted to have a section of the side-wall drop down into a patio. This would open up the interior space and give them a lot more options for how they utilised their build. They also wanted a lifting bed operating through a winch. This system means they can raise their bed to the ceiling, providing more useable space during the day without having to remake their bed constantly.
With plans in place and materials ordered we shifted gears slightly and started on some mechanical tasks. The couple wanted the cab removed so they could work on some renovations and interior work. After detaching everything between the cab body and the rest of the vehicle we used a chain block and an onsite forklift to remove it to be worked on elsewhere.
Upon discovering some weak, rusty sections in the flatbed we decided the best plan was to start again from scratch. A new flatbed gave us the opportunity to start from a strong base. We were also able to lower the habitation box’s starting height. With the flatbed lifted off the owners rubbed back the chassis for painting, then we were ready to start building.
The Framework
Once the steel arrived, we got to work on the flatbed. We cut the steel for the rail-on-rail mounting system then built the flatbed frame, welding it all into place and mounting it onto the Bedford. The new flatbed was extended beyond the original length. This gave them the maximum overhang allowance and the biggest box possible.
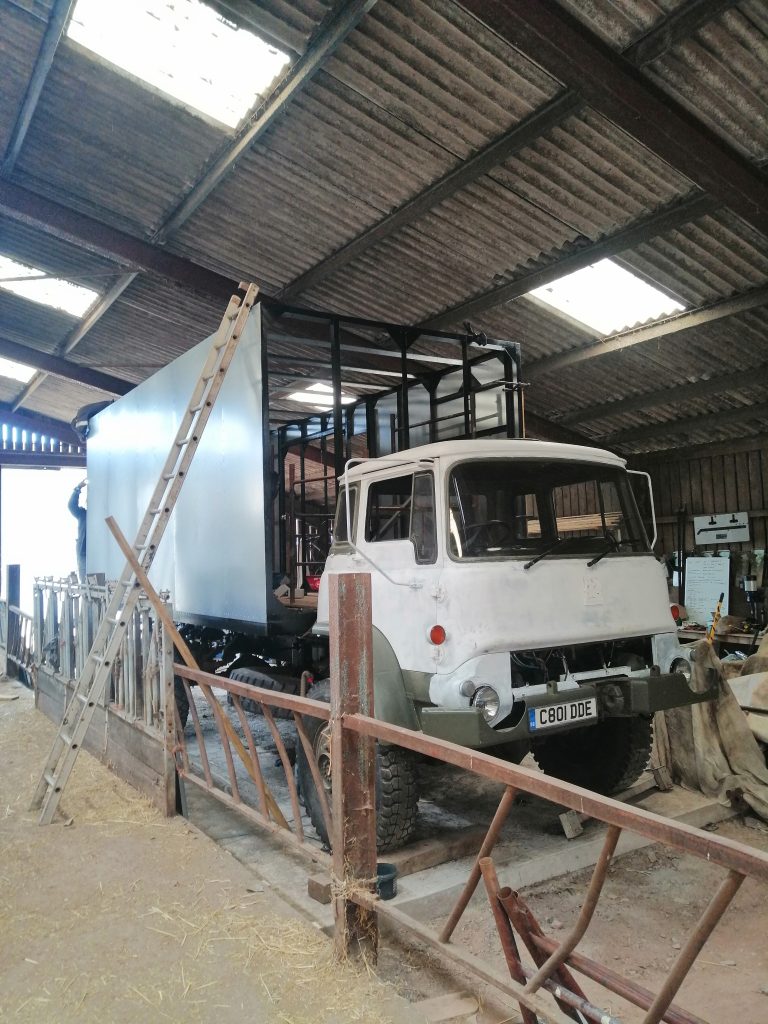
With the base complete it was time to move onto the actual habitation box frame. We cut all the necessary lengths of angle for the habitation box frame and notched them all for the best joins then started building. We laid out the steel for the fist long wall, squared it up and welded it into place. The second long wall was more complicated as it included the habitation door and framework for the ‘drop-down’ patio wall. With the long walls done, the next step was joining them together with the short walls. With some additional corner supports tacked into place we had a freestanding box.
We enlisted some extra hands, and with the help of a sturdy ratchet strap we lifted the habitation box onto the new flatbed. Stuart spent some time ensuring that everything was perfectly square before seam welding the box frame onto the flatbed. Once he was happy that everything was squared up correctly, he welded in the roof bars before adding in corner gussets to provide extra strength throughout the box.
With the main box complete Stuart framed out where the windows and service hatch would go. He then framed the crawl-through for access from the newly-remounted Bedford cab to the habitation box. The final bit of frame to make was the drop-down patio wall. Stuart ensured it fit just right before attaching the hinges and locking mechanisms before sliding it into place.
Sheeting
Despite ordering the steel sheets in plenty of time, there was a bit of a delay in delivery. However, this gave us time to work on some other little jobs such as relocating the rear protection bar to match the new rear length.
When ordering the steel, we asked for certain sizes to be cut and needed some of the sheets to be pre-folded. This meant that once it arrived and we’d checked everything through we could get to work.
The sheeting process required us to fit the sheets, drill the rivet holes, drop the sheets, de-burr the holes and run adhesive along all the edges then lift it back into place and rivet all the holes. We also added adhesive between the overlaps of the sheets for maximum hold and waterproofing.
We started with the floor sheets, to give us a good working platform for the rest of the build. This was followed by the two long sides, the short sides and then the roof. The roof sheets were trickiest but by trusting the process and working together we got the job done.
With the box sheeting done we moved onto sheeting the drop-wall using the same method. Finally, we cut the holes out for the windows and door to allow the owners to move onto the next stage of their build. They had chosen a carpentry team before they bought their truck, so we left them to it. We returned once the Bedford habitation box was ready for more fabrication and engineering work.
Truck Tasks
When we returned to the Bedford build there was a list of jobs for us to work through, though these were mostly focused on the base vehicle more than the habitation box. Firstly there were some bodywork repairs to do. This included some welding on the wheel arches, cab floor and around the back of the cab. After striping back the wheel arches and grinding back the rusty sections Stuart created some cardboard templates then cut the steel to match. He carefully shaped then welded in the new sections. After a bit of primer and paint it looked as good as new.
Next up was the rear of the cab where the rear window had been. After cutting out the rotten section Stuart rebuilt the body work and welded in the frame for the crawl-through. He built off the back of that frame, to create a short ‘tunnel’ between the cab and the habitation box. Once the crawl-through was sheeted this just needed a rubber seal to join to the habitation side’s frame. A flexible seal instead of a solid mount allows the necessary movement between the two sections.
With the fabrication work finished for the time being, we moved back to the mechanics. We were asked to fit an after-market power steering system to allow much easier handling. This was not a simple job. Stuart had to make a new tool in order to pull the old steering arm off, and the kit itself needed some modification as it was never designed for the Bedford MJ but eventually, we got it bolted into place. Despite being difficult to fit, this made a huge difference to the vehicles steering. Now driving this old truck isn’t such a workout.
Winching systems
The next step was fitting the lifting bed. The owners had a local company build their bed frame but wanted us to design and create the system which would raise and lower it from the ceiling onto their kitchen worktops.
After a lot of planning Stuart cut and mounted the vertical runners that the bed will slide up and down on. He also made the corresponding brackets to weld onto the bed frame. Luckily the frame itself has detachable sides out with the mattress area, making it much easier to work with. With the rail and roller system built, the next step was creating a winching system which allowed the bed to move smoothly. Stuart fell back on the skills he picked up working at sea, splicing eyes into the winching cable and running rigging around the bed.
With the bed frame clad we lifted it back into the truck. The winch was fitted at the end of the bed, with a vintage wheel for operation, and it was ready to go. After some adjustment the bed lifted and lowered smoothly and with the cladding it looked brilliant.
The next job was finishing the drop-down wall/patio. We had to insulate and clad it first, before deciding on the best locking mechanisms and making brackets to match. As with the bed it took a little time to decide on the best winching system. We had to ensure that the pulleys were mounted and cables rigged in a way that allowed the wall section to drop carefully and consistently. We also made some stays so the wall didn’t drop below the required height and as an additional safety support. These were eventually replaced with a Dyneema rope alternative for a more finished look when the wall is closed.
Last Tasks
With most of the complicated work done we had time for a few final jobs. The couple had bought a door skin and locking mechanism for the habitation doorway. Both were useable but needed some minor modifications. We slimmed down the depth of the door before building up the interior with wooden framing and insulation. The locking mechanism needed some modification and reshaping, and we cut out sections for a recessed door handle and a porthole window.
Stuart framed and faced the service hatch door before handing it off to some helpful volunteers who were visiting us. They finished it off with some nice woodwork and fitted the locking mechanisms while Stuart was completing the habitation door.
We have returned to do some additional work on the Bedford, including fitting roof bars to protect the solar panels. We also had to fix a hole in the roof from another company fitting those same solar panels and we helped out with a couple of finishing touches like adding rams to the service hatch door and some interior doors. These jobs came up after Jess and Dan moved in and had chance to test out their new home.
Final Thoughts
It was a brilliant experience for us, getting to work on this Bedford lorry and habitation box build. It made an interesting change from working on the Leyland DAF, and it was a great opportunity to implement our box build design on another off-road truck.
We were involved with every stage, from helping choose the ideal vehicle, up to and beyond the moving-in date. While we didn’t carry out the interior fit-out, we were still kept in the loop and provided support and suggestions whenever necessary. The customers were wonderful people with the most imaginative design ideas, and we became good friends throughout the course of the build.
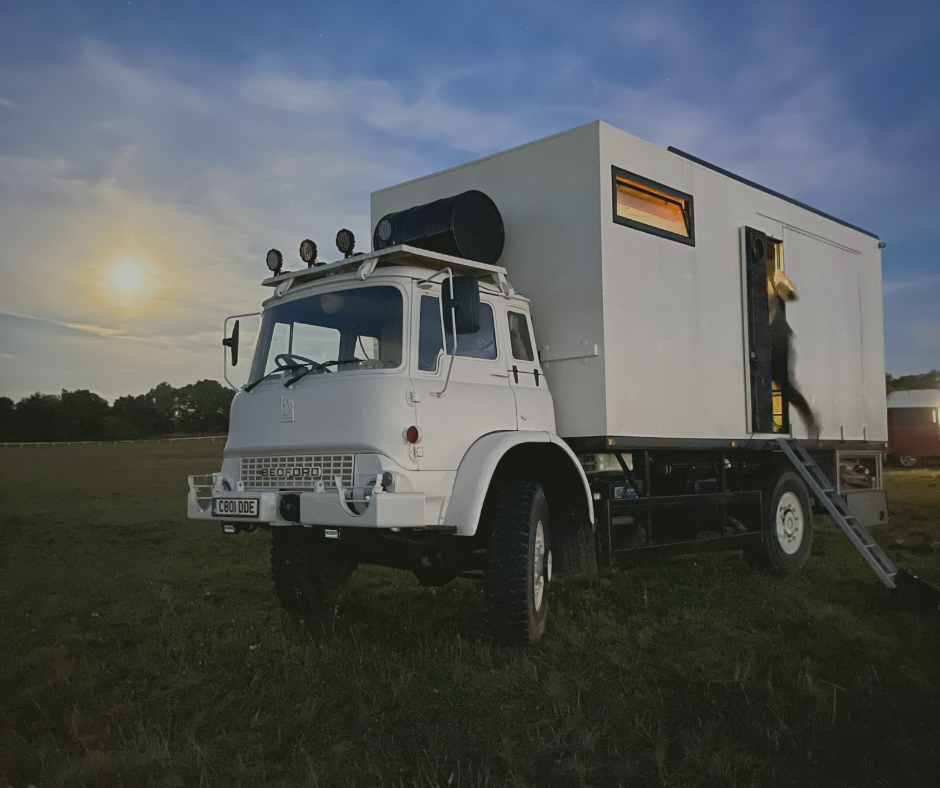
We will also be back to help with some mechanical upgrades later in the year. For now though, the Bedford build is a comfortable off-grid home, and a great example of what you can achieve with the right inspiration and an experienced team.
To find out more about Jess and Dan’s build check out their Instagram page .
If you’re interested in finding your own truck to convert into a home own wheels click here.